


Direct-to-Film (DTF) transfers revolutionize custom printing by applying intricate designs directly to fabrics, plastics, and metals using heat and pressure. Achieving high-quality DTF prints requires optimal heat settings, preheating, proper preparation, precise heating control, and curing. Following manufacturer guidelines ensures vibrant colors, sharp details, and durable finishes on diverse products via DTF printing.
“Mastering the art of applying direct-to-film (DTF) transfers requires an understanding of both the technology and precise heat settings. This guide delves into the intricacies of DTF printing, offering a comprehensive overview for achieving optimal results. From choosing the ideal heat settings to post-application curing, each step is crucial in creating vibrant, long-lasting DTF prints. Discover expert techniques, common pitfalls to avoid, and ensure your transfers become captivating additions to various materials.”
- Understanding Direct-to-Film (DTF) Transfers: A Brief Overview
- Choosing the Right Heat Settings for Optimal DTF Transfer Results
- Preheating and Preparation: Setting the Stage for Success
- Applying Heat: Techniques and Timings for Different Materials
- Common Mistakes to Avoid When Heating DTF Transfers
- Post-Heat Application: Curing and Final Touches for DTF Prints
Understanding Direct-to-Film (DTF) Transfers: A Brief Overview
Direct-to-Film (DTF) transfers are a cutting-edge method in printing that allows for the application of intricate designs and graphics directly onto various surfaces, such as fabrics, plastics, and metals, without the need for intermediate films or plates. This innovative process has revolutionized the way we approach custom printing, making it an attractive option for businesses and individuals alike. With DTF transfers, you can achieve high-quality, long-lasting prints with vibrant colors and sharp details.
The DTF transfer process involves a specialized printer that uses heat and pressure to fuse ink particles directly into the substrate material. This direct contact ensures a strong bond between the design and the surface, resulting in durable and wash-resistant DTF prints. The technology enables the reproduction of complex artwork, making it ideal for creating custom designs on a variety of products. Whether you’re looking to personalize clothing, enhance marketing materials, or add unique touches to home decor, DTF transfers offer a versatile and efficient solution.
Choosing the Right Heat Settings for Optimal DTF Transfer Results

When applying direct-to-film (DTF) transfers, selecting the appropriate heat settings is paramount to achieving exceptional results. The ideal temperature and pressure must be applied to ensure the design fuses correctly with the film, creating long-lasting, high-quality DTF prints. Too much heat can cause the ink to bleed or smudge, while insufficient heat may result in an incomplete transfer.
To optimize your DTF transfer process, begin by consulting the manufacturer’s guidelines for recommended heat settings specific to your film type and printer model. Consider factors like the film’s thickness and material composition. Adjusting the heating element temperature and applying uniform pressure across the entire print area can significantly impact the final output quality, ensuring crisp, vibrant colors and precise detail reproduction in each DTF print.
Preheating and Preparation: Setting the Stage for Success
Preheating and preparation are crucial steps in achieving high-quality DTF (Direct-to-Film) transfers. Before applying any transfer, ensure your printer and materials are at the optimal temperature. This process, known as preheating, minimizes thermal shock on the film, ensuring a crisp and accurate print. Start by powering on your printer and allowing it to heat up evenly. While waiting, prepare your work area by laying out all necessary components: DTF films, ink, applicator tools, and any cleaning supplies. A clean and organized workspace enhances efficiency and reduces the risk of errors during the printing process, resulting in pristine DTF prints.
Additionally, consider the environment where you’ll be working. Ideal conditions include a well-ventilated space to prevent the buildup of solvent fumes and a stable surface for your printer and materials. These preparatory measures set the stage for successful DTF printing, enabling you to achieve vibrant, long-lasting designs on a variety of surfaces.
Applying Heat: Techniques and Timings for Different Materials
Applying heat is a crucial step in the direct-to-film (DTF) transfer process, ensuring that the design is securely transferred to various materials. The technique and timing vary depending on the substrate, be it fabric, vinyl, or other materials. For DTF transfers, it’s essential to control both temperature and exposure time.
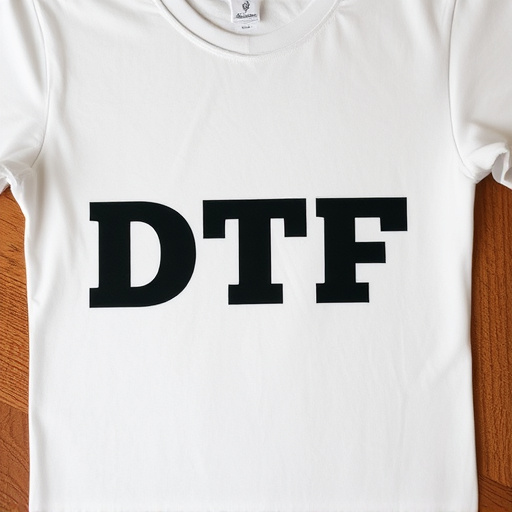
For textiles like t-shirts and totes, a moderate heat setting of around 300°F (149°C) for 15-20 seconds is typically effective. This gentle approach prevents the material from melting or deforming while ensuring the DTF print adheres firmly. Vinyl materials, on the other hand, may require slightly higher temperatures, approximately 350°F (177°C), for 25-30 seconds to achieve a secure bond. Always remember, timing is critical; over-applying heat can damage the substrate or the transfer itself, so precise control is vital for successful DTF printing.
Common Mistakes to Avoid When Heating DTF Transfers
When applying direct-to-film (DTF) transfers, heating is a critical step that requires precision to avoid common mistakes. One of the most frequent errors is overheating, which can cause the DTF print to bubble, wrinkle, or even lift from the substrate. This often occurs when the heat is set too high or left at that setting for an extended period. Each DTF material has its ideal temperature range, and exceeding this can lead to poor results.
Another mistake to steer clear of is insufficient heating. If the DTF transfer isn’t heated adequately, it won’t bond correctly to the substrate. This can result in prints that peel away from the surface or have a shallow adhesion. It’s crucial to follow manufacturer guidelines for the ideal heat and press times, ensuring even heat distribution across the entire print area for consistent and high-quality DTF prints.
Post-Heat Application: Curing and Final Touches for DTF Prints

After applying the direct-to-film (DTF) transfer and heat setting it according to the manufacturer’s guidelines, the next step is crucial for ensuring optimal print quality: curing. Curing involves allowing the ink to set completely within the film substrate. This process enhances the durability and longevity of your DTF prints, making them resistant to smudging or fading. Depending on the type of ink used, this can be as simple as letting it air dry for a specified period or using a heat press at a lower temperature to accelerate the curing process.
Once cured, inspect your DTF prints for any imperfections. This is also an excellent time to add final touches like trimming excess film, ensuring sharp edges, and verifying alignment. For best results, consider allowing the prints to cool down before handling them. Proper curing and final checks guarantee that your DTF transfers will provide vibrant colors, precise detail, and a professional finish when applied to various surfaces.