


Direct-to-film (DTF) transfers revolutionize printing by directly applying digital images onto various materials. High-resolution artwork (300 dpi or higher in vector format) prepared with opaque colors ensures vibrant, sharp DTF prints. Using the right film and state-of-the-art equipment guarantees excellent results. A meticulous process involves preparing artwork, calibrating printers, and precisely loading film. Post-processing includes curing and finishing techniques for enhanced durability. Best practices include precise registration, high-quality materials, thorough cleaning, and proper substrate preparation to avoid defects, fading, and poor adhesion.
Direct-to-film (DTF) transfers offer a unique way to bring your artwork to life on various surfaces. This guide provides comprehensive guidelines for mastering the DTF process. From understanding the fundamentals of DTF transfers and preparing your artwork, to selecting the right film and equipment, we cover it all. Learn the step-by-step application process, discover post-processing techniques, and avoid common mistakes. By following these practices, you’ll achieve exceptional DTF prints tailored to your vision.
- Understanding Direct-to-Film Transfers (DTF): A Brief Overview
- Preparing Your Artwork for DTF Transfer
- Choosing the Right Film and Equipment for DTF Printing
- Applying the DTF Transfer: Step-by-Step Guide
- Post-Processing: Enhancing Your DTF Prints
- Best Practices and Common Mistakes to Avoid
Understanding Direct-to-Film Transfers (DTF): A Brief Overview
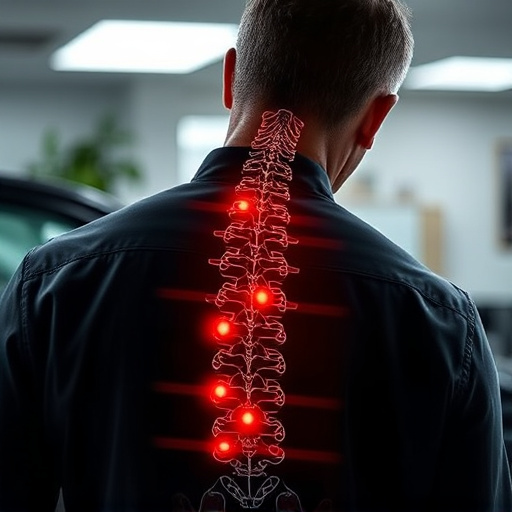
Direct-to-film transfers (DTF) represent a cutting-edge printing technique that facilitates the seamless transfer of digital images directly onto various surfaces, including metal, wood, and acrylic. This innovative process bypasses traditional intermediate steps, such as printing on paper, enabling direct application to the desired substrate. DTF technology has gained significant traction across diverse industries, from automotive and signage to art and custom accessories, thanks to its ability to produce high-resolution, vibrant prints with exceptional durability.
By eliminating the need for complex lamination or coating processes, DTF transfers offer a more straightforward and cost-effective solution for achieving long-lasting, visually stunning results. The process involves specialized printers that use UV-curable inks, which harden upon exposure to ultraviolet light, ensuring the image’s permanence. This technology not only enhances the aesthetic appeal of finished products but also provides a unique, customized touch, making DTF prints highly sought after in markets demanding both style and substance.
Preparing Your Artwork for DTF Transfer
Preparing your artwork for a direct-to-film (DTF) transfer is a crucial step in ensuring high-quality prints. Begin by ensuring your design is optimized for DTF printing, with a resolution of 300 dpi or higher. This ensures that the intricate details of your artwork are captured accurately on the final print. Use vector graphics whenever possible, as they scale seamlessly and produce sharp lines, which is essential for complex designs.
Before sending your artwork to the printer, check for any potential issues. Ensure there are no visible artifacts, distorted shapes, or low-resolution areas in your design. Opaque colors and solid fills work best for DTF transfers, as they allow for precise color reproduction and sharp edges when transferred to the film. By meticulously preparing your artwork, you set the stage for exceptional DTF prints that accurately represent your creative vision.
Choosing the Right Film and Equipment for DTF Printing

When it comes to direct-to-film (DTF) transfers, selecting the appropriate film and equipment is paramount for achieving high-quality DTF prints. The first step involves understanding your project’s specific needs. Different films offer varying levels of durability, color accuracy, and opacity, so choose a material that aligns with your desired outcome. For example, if you’re creating promotional materials or signs, a thicker, more durable film might be preferable to ensure longevity outdoors.
Additionally, investing in top-tier DTF printing equipment is crucial. This includes high-resolution printers capable of precise color reproduction and detailed imaging. Ensure your equipment is calibrated regularly to maintain consistent print quality. Proper maintenance and the use of certified films will result in vibrant, long-lasting DTF prints, making your project stand out.
Applying the DTF Transfer: Step-by-Step Guide

Applying a Direct-to-Film (DTF) transfer involves a precise process to ensure optimal results. Here’s a step-by-step guide for achieving successful DTF prints:
1. Prepare Your Artwork: Start by ensuring your design is high-resolution and free from any imperfections or pixelation. Convert it to a format compatible with your DTF printing software, typically a vector graphic like SVG or a raster image in PNG or JPEG. Adjust the colours and opacity if needed, considering the final output material.
2. Set Up Your Printer: Calibrate your printer according to the manufacturer’s instructions for DTF printing. This includes configuring the correct paper type, ensuring the print head is clean, and setting the optimal print quality. Load the specialized DTF transfer film into the printer, aligning it precisely with the feed path.
Post-Processing: Enhancing Your DTF Prints

After applying a direct-to-film (DTF) transfer, the post-processing stage is crucial for enhancing the final DTF prints. This involves several techniques to refine and optimize the image quality, ensuring the best possible outcome. One key step is curing the print; this process sets the ink and ensures long-lasting durability. The duration and intensity of curing can vary depending on the specific DTF transfer material used, so it’s essential to follow manufacturer guidelines for optimal results.
Additionally, post-processing may include trimming and finishing techniques to achieve a professional look. Trimming excess film and ensuring precise cut lines is vital, especially when dealing with intricate designs. Some printers offer die-cutting capabilities, allowing for precise and clean cuts. Finishing touches such as coating or laminating can also be applied to protect the prints, enhance their appearance, and extend their lifespan.
Best Practices and Common Mistakes to Avoid

Best Practices and Common Mistakes to Avoid with Direct-to-Film (DTF) Transfers
When applying DTF transfers, best practices involve ensuring precise registration for clear, sharp imaging. Use high-quality film and inks to guarantee durable DTF prints that withstand handling and environmental conditions. Always clean the film surface thoroughly before application to prevent contaminants from affecting print quality. Adequate preparation of the substrate—cleaning, sanding, and priming as necessary—is also critical for optimal DTF transfer results.
Avoid common mistakes by understanding the limitations of DTF technology. Misalignment during registration can lead to visible defects in final prints, so take your time and double-check positioning. Using low-quality materials or inks may result in faded or inaccurate prints over time. Additionally, neglecting proper substrate preparation can cause issues with adhesion and durability. Remember, patience and attention to detail are key when working with DTF transfers to achieve professional-looking outputs.