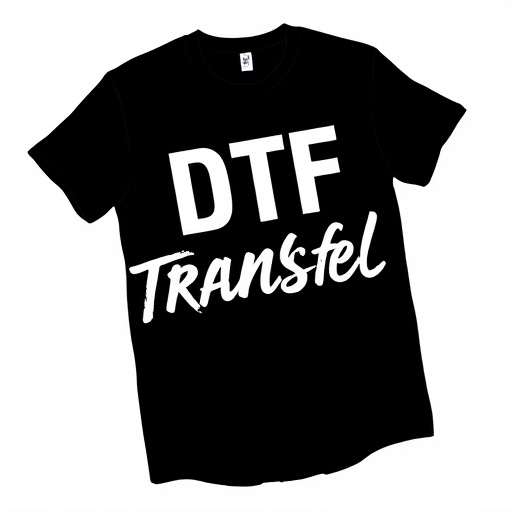


Direct-to-film (DTF) printing is a cutting-edge technique for high-quality image production on diverse surfaces. To prepare designs, use high-resolution vector or raster graphics with 300 DPI and CMYK color profile. Printer setup involves selecting compatible models with excellent dot density, loading DTF transfer film, and calibrating settings. Heating and curing at 150-200°C for 15-30 seconds ensures strong adhesive bonding. Post-print care includes allowing ink to cure fully, cleaning with microfiber cloths, and protecting from sunlight and moisture.
Direct-to-film (DTF) printing offers a revolutionary way to create high-quality, long-lasting prints on various materials. This step-by-step guide delves into the world of DTF transfer, providing insights for both beginners and seasoned users. From understanding the basics of DTF technology to post-print care, you’ll learn how to achieve optimal results. Master the art of preparing designs, setting up compatible printers, applying transfers, and curing prints to produce vibrant, durable DTF prints that stand the test of time.
- Understanding Direct-to-Film (DTF) Transfer: A Basic Concept
- Preparing Your Design for DTF Printing: File Format and Resolution
- Setting Up Your Printer: Ensuring Compatibility and Quality
- Applying the DTF Transfer: Step-by-Step Guide
- Heating and Curing the Print: Optimal Conditions for Adhesion
- Post-Print Care and Maintenance: Extending the Lifespan of Your DTF Prints
Understanding Direct-to-Film (DTF) Transfer: A Basic Concept

Direct-to-film (DTF) transfer is a printing technique that allows for the creation of high-quality images and graphics directly onto various surfaces, including fabric, paper, and plastic. This method eliminates the need for traditional intermediate steps like film positives or plates, streamlining the production process. DTF Printing offers numerous advantages, such as faster turnaround times, cost-effectiveness, and exceptional detail retention, making it a popular choice among professionals in industries ranging from apparel to signage.
The process involves precisely applying ink directly onto the target surface through a specialized printing press or machine. This direct contact ensures precise color reproduction and sharp lines, ideal for intricate designs and detailed artwork. DTF Prints are known for their vibrant colors, durability, and ability to create unique, customized products quickly, catering to the demand for personalized and on-trend items in today’s market.
Preparing Your Design for DTF Printing: File Format and Resolution

To prepare your design for DTF (Direct-to-Film) printing, it’s crucial to ensure your file format and resolution meet the requirements. For optimal results, use high-resolution vector graphics or raster images with a minimum of 300 DPI (dots per inch). Vector formats like AI (Adobe Illustrator) or EPS allow for seamless scaling without losing quality, which is essential for precise DTF transfers. Raster images in PNG or JPEG format should also be optimized; consider saving them at the highest quality setting to maintain sharp details and prevent pixelation.
When designing, keep in mind that DTF prints rely on accurate color representation. Use a CMYK color profile for your design software as this matches the printing process. Avoid using web-safe colors or transparent backgrounds directly; instead, convert transparent elements to solid colors or use masking techniques to ensure seamless integration with the DTF transfer material. Lastly, check for any potential print artifacts or imperfections in your design before sending it off for printing; a thorough review will save you time and ensure you achieve the desired DTF prints.
Setting Up Your Printer: Ensuring Compatibility and Quality
Setting up your printer for direct-to-film (DTF) printing is a crucial step to ensure top-quality DTF prints. First, verify compatibility; not all printers support DTF transfers. Check your printer’s specifications and ensure it’s designed for this specific application. High-resolution printing is key, so opt for a printer with excellent dot density and color accuracy.
Once you’ve selected the right printer, load the appropriate DTF transfer film into the feeding mechanism. Ensure proper alignment and positioning of the film to avoid misprints. Calibrate your printer’s settings for optimal DTF printing, adjusting resolution, color profiles, and ink levels accordingly. Regular maintenance and cleaning of the print head will also ensure consistent quality with each DTF transfer.
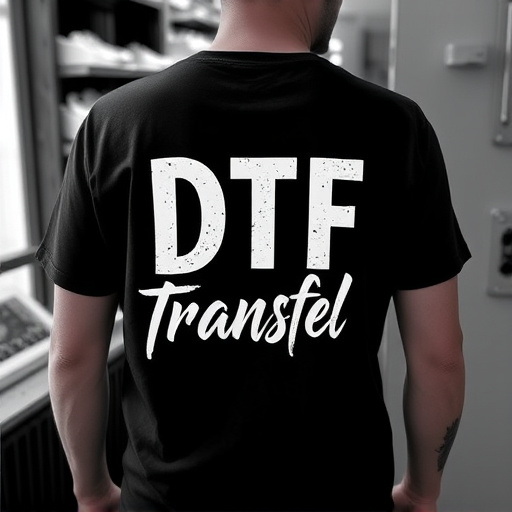
Applying the DTF Transfer: Step-by-Step Guide
Applying the DTF Transfer: A Step-by-Step Guide
1. Prepare Your Substrate: Start by ensuring your substrate—whether it’s t-shirt, mug, or canvas—is clean and free of any debris or oils. This step is crucial as any impurities can affect the quality of your final print.
2. Position the Print: Place your desired DTF transfer onto the substrate precisely where you want the design to appear. Use a smooth surface to ensure there are no wrinkles or bubbles under the film, which could distort the final image. Adjust the placement until you’re satisfied with the positioning.
3. Heat Application: Preheat your iron to the recommended temperature for your DTF transfer. Typically, this ranges between 175°F – 200°F (80°C – 93°C). Once heated, apply the iron directly onto the film for a few seconds. The heat will activate the adhesive underneath, transferring the design from the film to your substrate.
4. Timing is Key: Keep an eye on the timing as over-heating or under-heating can damage the print or leave residue. For most DTF transfers, 10-30 seconds of direct contact with a heated iron should be sufficient. Remove the iron and let it cool slightly before peeling away the transfer film.
Heating and Curing the Print: Optimal Conditions for Adhesion

After applying the DTF transfer to your substrate, heating and curing the print is a crucial step in ensuring optimal adhesion. The ideal conditions for this process vary depending on the specific DTF product and substrate combination but generally involve heating the material to a temperature range of 150-200°C (302-392°F) for a set duration, typically between 15-30 seconds. During this time, the heat activates the adhesive properties of the DTF layer, allowing it to bond firmly with the substrate.
It’s essential to maintain precise temperature and time controls to avoid damage or uneven adhesion. Exceeding the recommended temperature or curing for too long can lead to warping or discoloration of the print. Conversely, insufficient heating may result in poor bonding. Therefore, following the manufacturer’s guidelines and using specialized equipment designed for DTF printing is paramount to achieving strong, long-lasting prints on a variety of materials, from textiles to plastics and metals.
Post-Print Care and Maintenance: Extending the Lifespan of Your DTF Prints
After printing with direct-to-film (DTF) technology, proper care and maintenance are essential to ensure your prints last for years to come. The first step in post-print care is to allow the ink to cure completely before handling or displaying the print. This usually takes 24 hours, but the exact time can vary depending on the specific DTF transfer you’ve used and the conditions during printing. Touching or moving the print too soon can smudge or damage the delicate ink layers.
Regular cleaning is another crucial aspect of maintaining DTF prints. Dust and fingerprints can accumulate on the surface, affecting both the aesthetics and longevity of your artwork. Use a soft, dry microfiber cloth to gently wipe down the print, removing any visible debris. Avoid using harsh chemicals or cleaning solutions as they can damage the ink and substrate. Additionally, frame or mount your DTF prints properly to protect them from direct sunlight and moisture, which can cause fading or warping over time.