


Sway bar bushings are vital for vehicle stability, absorbing lateral forces and preventing excessive body lean. Worn bushings cause noise, uneven tire wear, and handling issues. Regular inspection, simple upgrades using new bushings, and professional guidance ensure optimal handling and safety.
“Enhance your vehicle’s stability and handling with an upgrade to sway bar bushings. This comprehensive guide delves into the essential role of these components, explaining how they connect your car’s suspension to the chassis, ensuring a smooth ride through corners. If you suspect worn or damaged bushings, diagnosis is key. We’ll walk you through a step-by-step process for upgrading them, offering expert tips to ensure optimal performance and safety.”
- Understanding Sway Bar Bushings: Function and Importance
- Diagnosing Worn or Damaged Bushings
- Upgrading Bushings: Step-by-Step Guide and Tips
Understanding Sway Bar Bushings: Function and Importance
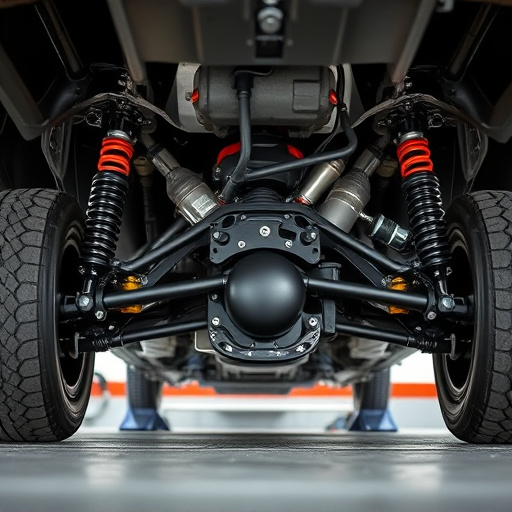
Sway bar bushings are crucial components in a vehicle’s suspension system, designed to connect the sway bar (also known as anti-roll bar) to the chassis. Their primary function is to allow the sway bar to absorb and distribute lateral forces, enhancing vehicle stability during cornering or on uneven roads. These bushing components play a vital role in ensuring optimal handling and reducing body roll, especially in high performance parts like those found in modified vehicles with performance exhaust systems.
By allowing limited movement between the sway bar and chassis, sway bar bushings provide a balance between firm control and flexibility. This setup prevents excessive body lean, ensuring drivers maintain better control over their vehicles, especially at high speeds or during aggressive driving maneuvers. When these bushing components wear out or become damaged, it can result in reduced stability, increased body roll, and potentially compromising the overall safety of the vehicle, highlighting the importance of regular inspection and timely replacement when needed.
Diagnosing Worn or Damaged Bushings
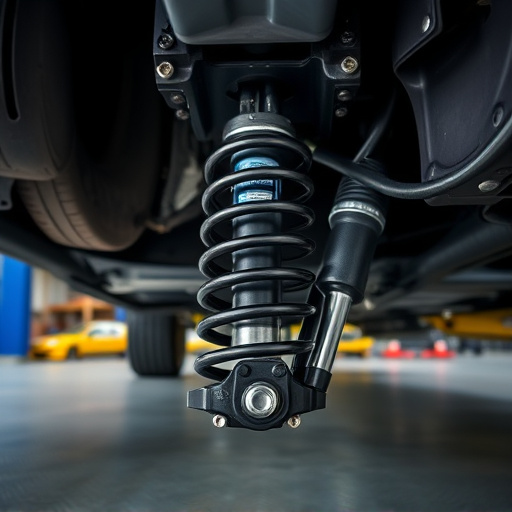
When it comes to diagnosing worn or damaged sway bar bushings, paying close attention to unusual noises is a good starting point. If you hear clicking, popping, or clunking sounds while driving over bumps or turning corners, these could be signs that your bushings have deteriorated and need replacing. Visually inspecting the bushings can also reveal wear and tear; look for any cracks, deformities, or excessive play in the suspension components.
Additionally, checking for excessive tire wear patterns can indicate problems with the sway bar bushings. If you notice uneven tire wear, particularly on one side of the vehicle, it might be an indication that the bushings are not properly supporting the sway bar, leading to misalignment and increased strain on other suspension parts like coilover kits, brake components, and muffler tips. Regular maintenance checks can help catch these issues early, ensuring better stability and safety while driving.
Upgrading Bushings: Step-by-Step Guide and Tips
Upgrading sway bar bushings is a relatively straightforward process that can significantly enhance your vehicle’s stability and handling. Here’s a step-by-step guide to help you through the task:
1. Safety First: Park your vehicle on a level surface, engage the parking brake, and ensure it’s in gear (if automatic). Remove the wheel for easy access to the sway bar components. Safety should always be your top priority when working on any vehicle parts.
2. Identify the Sway Bar Bushings: Locate the sway bar bushings, which are typically found connecting the sway bar to the chassis or other suspension components. These bushings absorb shock and vibrations from road imperfections, keeping your vehicle stable during turns and at high speeds.
3. Remove Old Bushings: Use a suitable tool to remove the old bushings. This might involve unscrewing or prying them out of their sockets. Take note of how they are installed for easy reassembly later.
4. Prepare New Bushings: Clean the mounting surfaces thoroughly to ensure a secure fit. Some new bushings may come with adhesive; apply it according to the manufacturer’s instructions for optimal hold.
5. Install New Bushings: Fit the new sway bar bushings into place, ensuring they are aligned correctly. Tighten them securely, following the vehicle manufacturer’s specifications for torque settings where applicable.
6. Reassemble and Test: Put back the wheel and ensure all components are properly secured. Test your vehicle’s handling at low speeds first, then gradually increase speed to verify that the upgrades have improved stability and reduced body roll.
Remember, when upgrading any automotive parts, including sway bar bushings, it’s crucial to follow manufacturer guidelines and consider seeking professional advice if you’re unsure. Additionally, keeping your exhaust systems, cat back exhaust, and exhaust mufflers in good condition can complement these upgrades for optimal vehicle performance.
Upgrading your vehicle’s sway bar bushings is a straightforward yet effective way to enhance driving stability and safety. By following the step-by-step guide provided, you can easily diagnose worn or damaged parts and make informed decisions when selecting replacement bushings. Investing in high-quality sway bar bushings ensures better control, reduces body roll during cornering, and contributes to overall vehicle stability, making it a valuable maintenance task for any car enthusiast.