


Custom DTF Transfers Ready To Press transform design creation, especially for t-shirts, by using specialized heat transfer paper and a top printer. Prepare your workspace with essential tools like heat-resistant surfaces, presses, and lighting for visibility. Apply transfers by preheating substrates, securing film, pressing at recommended temperature and duration to achieve professional results.
“Unleash your creativity with Custom DTF Transfers, a game-changer for designing unique, high-quality prints. This comprehensive guide is your roadmap to mastering the art of applying these transfers ready to press. From understanding the process to preparing your workstation and following a step-by-step approach, you’ll learn everything needed to create stunning, long-lasting designs. Get ready to elevate your DIY projects with the precision and ease of Custom DTF Transfers.”
- Understanding Custom DTF Transfers
- Preparing Your Workstation For Pressing
- Step-by-Step Guide: Applying DTF Transfers
Understanding Custom DTF Transfers

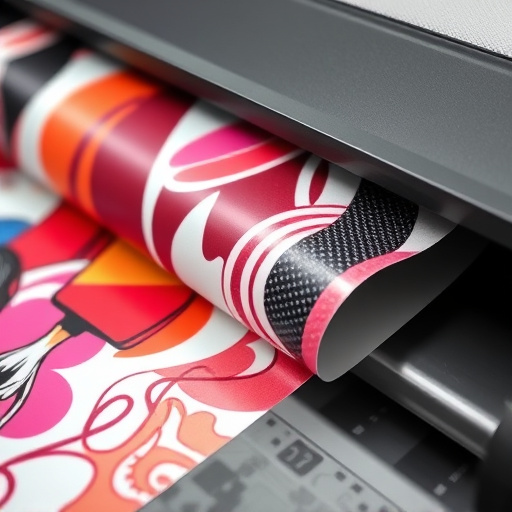
Custom DTF Transfers Ready To Press offer a cutting-edge solution for creating unique and high-quality designs on various materials, particularly custom t shirts. This innovative technique involves utilizing specialized dtf heat transfer paper, which is designed to adhere to fabrics during the pressing process. The DTF (Direct-To-Fabric) method allows for precise application of intricate designs, making it a favorite among professionals and hobbyists alike who seek to bring their creative visions to life on wearable items.
With a best DTF printer at your disposal, navigating the world of custom t shirt design becomes more accessible and efficient. This technology enables users to produce stunning artwork with vibrant colors and crisp details, ensuring that each transfer is ready for pressing with minimal preparation. Whether you’re aiming to impress clients with branded merchandise or simply enjoy the process of designing and creating, understanding Custom DTF Transfers can unlock a realm of possibilities for your creative endeavors.
Preparing Your Workstation For Pressing
Before beginning the pressing process for your custom DTF Transfers, ensuring your workstation is prepared is paramount. Start by clearing a dedicated workspace, free from clutter and debris, to create a clean environment that facilitates precision and efficiency. Gather all necessary tools and materials, including your custom DTF transfers ready to press, heat-resistant surfaces, presses (either manual or automated), and the appropriate heat application tools.
Organize these items logically to streamline your workflow. Position your work surface at a comfortable height to prevent strain during extended use. Consider adding lighting to enhance visibility, especially when dealing with intricate logos DFT for clothing brands or custom t-shirts. With these preparations in place, you’ll be well-equipped to handle the pressing process smoothly and achieve professional results with your cold peel DTF transfers.
Step-by-Step Guide: Applying DTF Transfers
Applying Custom DTF Transfers Ready to Press is a straightforward process when followed step-by-step. Begin by ensuring your work area is clean and organized, with all necessary tools within reach: your DTF printer, transfer film, heat press machine, and the items you want to customize, such as t-shirts or hoodies. Preheat both the heat press and your chosen substrate (t-shirt or hoodie) according to the manufacturer’s instructions for optimal results.
Next, carefully remove the backing from the DTF transfer film, revealing the design. Position the design face-down onto the preheated substrate, ensuring it aligns perfectly with your desired location. Once the design is secured, apply even pressure across the entire surface of the transfer using a squeegee or presser bar. Heat up the heat press to the recommended temperature and time for the type of fabric you’re working with (refer to the DTF printer’s manual for guidelines). Press firmly, following the manufacturer’s instructions for pressure and duration, then carefully remove the heat press to reveal your custom design transferred onto the substrate.
Custom DTF transfers, ready to press, offer a versatile and efficient method for creating high-quality designs on various materials. By understanding the process, preparing your workstation appropriately, and following the step-by-step guide provided, you can achieve professional results with ease. Now that you’re equipped with the knowledge from this article, go ahead and bring your custom transfers to life!