


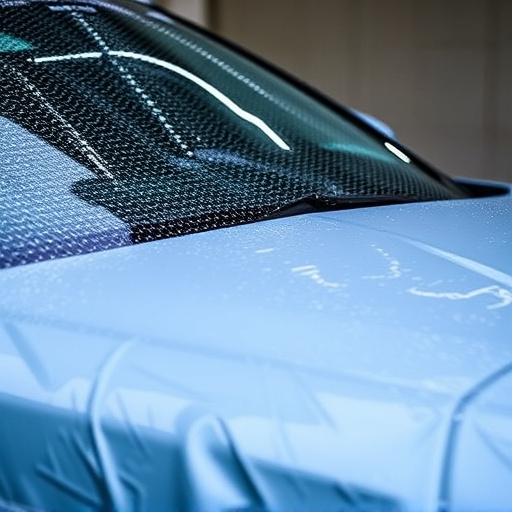
Swirl marks, often caused by window tinting or customization, can range from superficial to deep, impacting a car's paint protection and aesthetics. Professional evaluation is crucial for correct removal techniques, avoiding further damage from aggressive methods. Surface preparation and post-treatment care with protective coatings ensure successful removal and longevity of the repair.
“Common Mistakes to Avoid in Swirl Mark Removal” explores the pitfalls that do-it-yourselfers and professionals alike often encounter. Swirl marks, unsightly defects on car paint, require meticulous care. This article guides you through three key areas: understanding the severity of your swirl marks accurately, selecting suitable removal techniques tailored to your damage, and mastering pre- and post-treatment surface prep for optimal results. Steer clear of these mistakes to ensure a flawless restoration. Learn how to achieve a smooth, glossy finish with effective swirl mark removal techniques.
- Incorrect Assessment of Swirl Mark Severity
- Choosing Inappropriate Removal Techniques
- Neglecting Surface Preparation and Post-Treatment Care
Incorrect Assessment of Swirl Mark Severity

When considering swirl mark removal, one of the most common mistakes individuals make is assessing the severity of the issue incorrectly. Many car owners might notice a few subtle swirls or scratches on their vehicle’s paint and assume they’re minor, manageable, or even unnoticeable. However, what appears as a small imperfection could be indicative of more extensive damage beneath the surface. Swirl marks can range from superficial to deep, affecting not only the aesthetics but also the overall protection of the vehicle’s finish.
To avoid this mistake, it’s crucial to understand that even seemingly minor swirls can leave behind unwanted heat rejection and affect the paint’s clarity and durability over time. Inadequate assessment might lead to incorrect solutions, such as using the wrong products or not addressing the root cause. Proper evaluation by professionals is essential to determine the severity and recommend appropriate swirl mark removal techniques, ensuring optimal scratch protection and maintaining the vehicle’s original finish.
Choosing Inappropriate Removal Techniques
Choosing the wrong removal technique is a common mistake when it comes to swirl mark removal. Swirl marks, often resulting from improper window tinting or car customization, require specialized care. Using aggressive methods like abrasive scrapers can cause further damage and even embed the mark deeper into the paintwork. It’s crucial to understand that different techniques are designed for various types of swirl marks and surfaces.
For instance, while some methods might be effective for light scuffs, they could leave behind unsightly residue or scratch the clear coat. Custom graphics enthusiasts often find themselves in this dilemma, as their intricate designs demand delicate treatment. The key is to identify the severity of the swirl mark and select a removal technique accordingly—whether it’s a simple compound and polish routine or a more advanced solution like chemical swirls removers or UV curing.
Neglecting Surface Preparation and Post-Treatment Care

Before attempting any swirl mark removal techniques, proper surface preparation is paramount. Many enthusiasts make the mistake of skipping this crucial step, assuming that their products will work miracles on an unprepared panel. However, achieving flawless results requires a clean and decontaminated surface to ensure optimal adhesion and long-lasting effects. Surface prep involves removing dirt, grease, wax, or any other foreign substances that could hinder the process. This often includes washing, degreasing, and polishing the area to create a smooth base for application.
Similarly, post-treatment care is an oft-neglected aspect of swirl mark removal and vehicle enhancement in general. After applying corrective products, it’s essential to protect the newly restored surface with appropriate coatings or sealers. These protective layers not only add shine but also create a barrier against UV rays, environmental contaminants, and future swirls. Skipping this step can result in reduced longevity of the repair, requiring more frequent maintenance. Remember, proper preparation and aftercare are key to maintaining a flawless finish and ensuring the effectiveness of your swirl mark removal efforts.
When attempting swirl mark removal, avoiding common pitfalls is key to achieving optimal results. Always assess swirl marks accurately, selecting removal techniques suited to their severity. Prioritize thorough surface preparation and post-treatment care for long-lasting, satisfying outcomes in your swirl mark removal efforts.