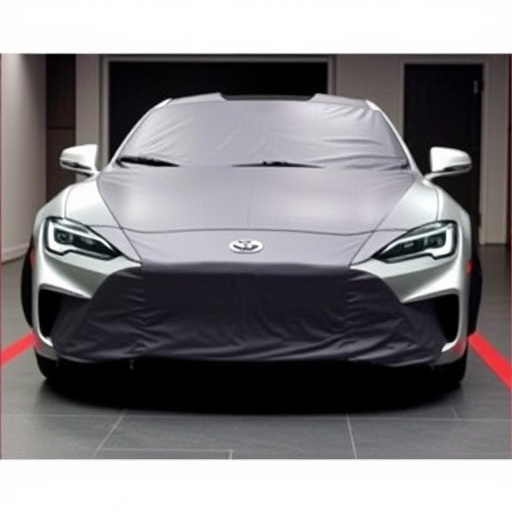


Before installing racing stripes, unroll and smooth them on a flat surface, then trim excess material for a perfect fit. Measure and mark hood vents accurately to guide stripe placement. Use flexible tools or heat-formable materials for curves, and consider PPF for scratch protection during cutting.
Looking to enhance your vehicle’s style with precise racing stripe installation? This guide walks you through the art of cutting racing stripes for hood vents and curves. From preparing your materials to meticulous marking and cutting, we’ll equip you with the knowledge to achieve a flawless finish. Master the techniques to install racing stripes with precision, ensuring both aesthetic appeal and long-lasting durability.
- Prepare Your Racing Stripes for Cutting
- Measure and Mark Hood Vents Accurately
- Cut and Install Stripes on Curves with Precision
Prepare Your Racing Stripes for Cutting

Before you begin cutting your racing stripes for those tricky hood vents and curves, it’s crucial to prepare them properly for a seamless installation. Start by unrolling the entire roll of racing stripes on a clean, flat surface, ensuring all edges are aligned and smooth. This step is vital as it allows you to visualize the pattern and identify any potential issues with the material. Check for any creases, wrinkles, or air bubbles, which can affect the final look and durability of your stripes.
Once the stripes are laid out, use sharp scissors or a utility knife (with caution) to trim away excess material from the edges, especially around curved areas. This precise cutting will ensure a snug fit when applied to your vehicle’s surfaces, whether it’s for window tinting or enhancing custom vehicle wraps.
Measure and Mark Hood Vents Accurately
To ensure precise cutting for your racing stripes installation, accurately measuring and marking hood vents is crucial. Begin by tracing the contours of your vehicle’s hood, focusing on the vents and curves. Use a tape measure to take exact dimensions, noting the length and width of each vent. This detailed measurement will guide your stripe placement, ensuring they conform perfectly to your car’s design.
For added protection against environmental factors like UV rays and ceramic window tinting, consider marking the areas where you plan to apply the stripes. This proactive step not only aids in accurate cutting but also enhances the overall vehicle protection, a key benefit often sought after by car owners.
Cut and Install Stripes on Curves with Precision

When it comes to installing racing stripes on curved surfaces like hood vents, precision is key. To ensure a clean and professional finish, measure twice and cut once. Begin by marking out the desired stripe pattern using a fabric pencil or marker designed for automotive applications. This will help guide your cuts and maintain consistency throughout the installation process.
For curves, consider using a flexible cutting tool or a heat-formable racing stripe material to accommodate the contours of the hood vents. Cut the stripes with careful consideration, allowing for slight overlap at intersections. A professional paint protection film (PPF) installation technique can be employed here: apply a thin layer of PPf beneath the stripes to protect both the vehicle’s surface and the adhesive from scratches during the cutting process. This step ensures a seamless finish that enhances the aesthetic appeal of your racing stripes without compromising their longevity.
Precision cutting and strategic installation are key to achieving clean, professional-looking racing stripes on your vehicle’s hood vents and curves. By carefully measuring, marking, and utilizing appropriate cutting techniques, you can transform your car’s exterior with these striking accents. Remember, the right tools and attention to detail will make this DIY project a success, enhancing your vehicle’s aesthetic appeal and showcasing your custom racing stripe installation skills.