
Satin finish wraps are popular vehicle customization options offering style, protection, and customizability for DIY enthusiasts. To achieve a successful DIY project, invest in high-quality materials, set up a clean workspace, and follow structured steps including preparation, cleaning, and application of even coats to avoid imperfections. This results in professional-looking satin finish wraps with scratch protection and elegant aesthetics.
Are you looking to transform your packaging game? DIYing a satin finish wrap can add a luxurious touch without breaking the bank. This guide dives into the world of satin finishes, exploring their diverse types and unique properties. We’ll equip you with the essentials for your DIY project, from tools to materials. Then, follow our step-by-step instructions to achieve a flawless satin finish without any mess or ruin. Master the art of wrapping with elegance!
- Understanding Satin Finish Wraps: Types and Their Unique Properties
- Gathering the Right Tools and Materials for a DIY Project
- Step-by-Step Guide: Applying a Satin Finish Without Messing Up
Understanding Satin Finish Wraps: Types and Their Unique Properties

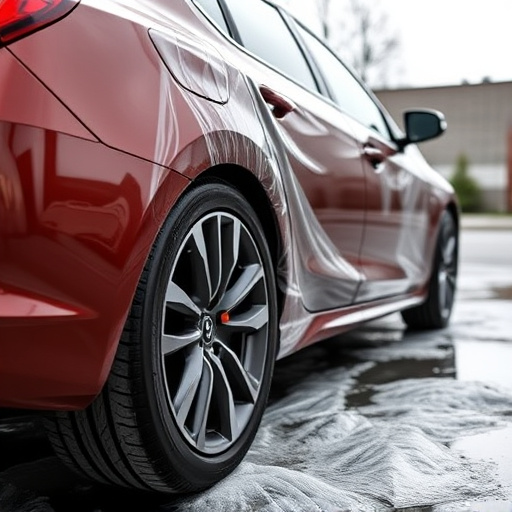
Satin finish wraps are a popular choice for vehicle customization due to their luxurious and sleek appearance. These wraps come in various types, each with distinct properties that make them suitable for different applications. For instance, some satin finishes offer superior UV protection, making them ideal for outdoor use as they safeguard against fading and damage caused by sunlight. Others are designed for window tinting, providing a subtle yet stylish look while maintaining privacy. Moreover, custom graphics can be printed on these wraps, allowing car owners to express their individuality or promote their brand.
The versatility of satin finish wraps lies in their ability to transform any vehicle into a unique and eye-catching masterpiece. Whether it’s a simple matte finish for a subtle touch or a more intricate design with vibrant colors, these wraps provide an affordable alternative to painting while still offering long-lasting protection over the original car surface. This makes them a preferred choice for DIY enthusiasts looking to enhance their ride without breaking the bank or risking damage from traditional repainting methods.
Gathering the Right Tools and Materials for a DIY Project

Before tackling a DIY satin finish wrap project, it’s crucial to gather the right tools and materials. For a successful outcome, invest in high-quality finishes tailored for vehicle wraps. This includes top-notch vinyl wrap films, specialty applicator tools, and precision knives designed for intricate cutting and detailing. Don’t skimp on these essentials; they’re key to achieving a professional look without ruining your wrap.
Additionally, secure a clean, well-lit workspace equipped with protective gear such as gloves and respirators. Consider acquiring paint correction kits if you anticipate any minor imperfections or scratches on the surface. By arming yourself with the proper resources, you’ll be better positioned to navigate the process smoothly, ensuring a striking satin finish wrap that enhances your vehicle’s aesthetics.
Step-by-Step Guide: Applying a Satin Finish Without Messing Up

Creating a satin finish on your vehicle wraps is achievable if you follow a structured, step-by-step approach. Start by preparing your work area and gathering all necessary materials, including your chosen satin finish wrap, applicators, or brushes, and a suitable solvent or adhesive designed for vehicle wraps. Ensure excellent ventilation to avoid inhaling any harmful fumes from the chemicals used.
Begin by thoroughly cleaning the surface of your vehicle wrap to remove any dirt, grease, or residue. This crucial step ensures that the satin finish adheres correctly. Use a mild detergent and warm water to wash the area, then rinse well and dry completely with a clean towel. Next, apply an even coat of the chosen satin finish wrap using the recommended applicator or brush. Move in smooth, even strokes, ensuring no gaps or overlaps. Allow the first layer to dry as per the product instructions before adding a second coat for enhanced durability and a more vibrant finish. Remember, patience is key; allowing adequate drying time between coats will result in a professional-looking satin finish on your vehicle wraps, providing both scratch protection and an elegant aesthetic, much like window tinting without the mess or hassle.
DIYing a satin finish wrap is achievable with the right knowledge and tools. By understanding the different types of satin finish wraps and their unique properties, you can select the best option for your project. With a well-equipped toolkit and a step-by-step guide, you’ll be able to apply a flawless satin finish without any mess-ups. Now, you can enhance your wrapping game with beautiful, professional-looking satin finish wraps at home.